
|

|

|

|

|

|

|
|
| DataNucleus AccessPlatform 4.1 Documentation |
|
|
|
|
|
|
|
|
|
|
Eclipse provides a powerful development environment for Java systems. DataNucleus provides its own plugin for use within Eclipse, giving access to many features of DataNucleus from the convenience of your development environment.
The DataNucleus plugin requires Eclipse 3.1 or above. To obtain and install the DataNucleus Eclipse plugin select Help -> Software Updates -> Find and Install On the panel that pops up select Search for new features to install Select New Remote Site, and in that new window set the URL as http://www.datanucleus.org/downloads/eclipse-update/ and the name as DataNucleus. Now select the site it has added "DataNucleus", and click "Finish". This will then find the releases of the DataNucleus plugin. Select the latest version of the DataNucleus Eclipse plugin. Eclipse then downloads and installs the plugin. Easy!
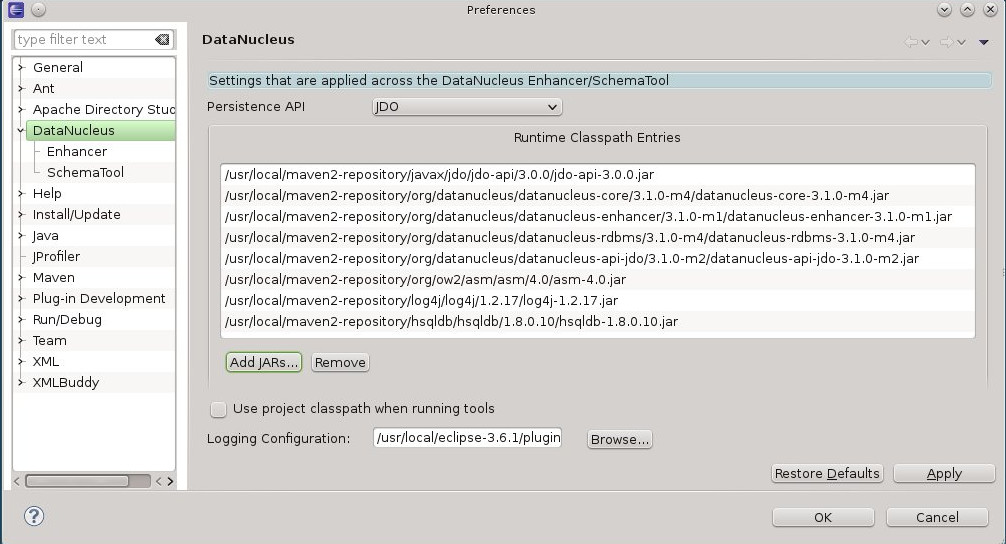
The DataNucleus Eclipse plugin allows saving of preferences so that you get nice defaults for all subsequent usage. You can set the preferences at two levels :-
Firstly open the main plugin preferences page, set the API to be used, and configure the libraries needed by DataNucleus. These are in addition to whatever you already have in your projects CLASSPATH, but to run the DataNucleus Enhancer/SchemaTool you will require the following
Below this you can set the location of a configuration file for Log4j to use. This is useful when you want to debug the Enhancer/SchemaTool operations.
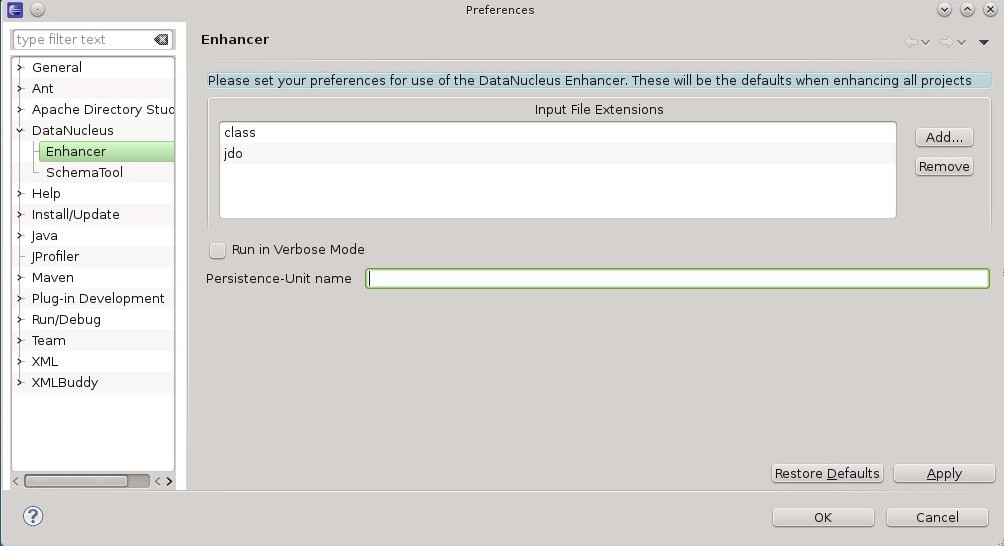
Open the "Enhancer" page. You have the following settings
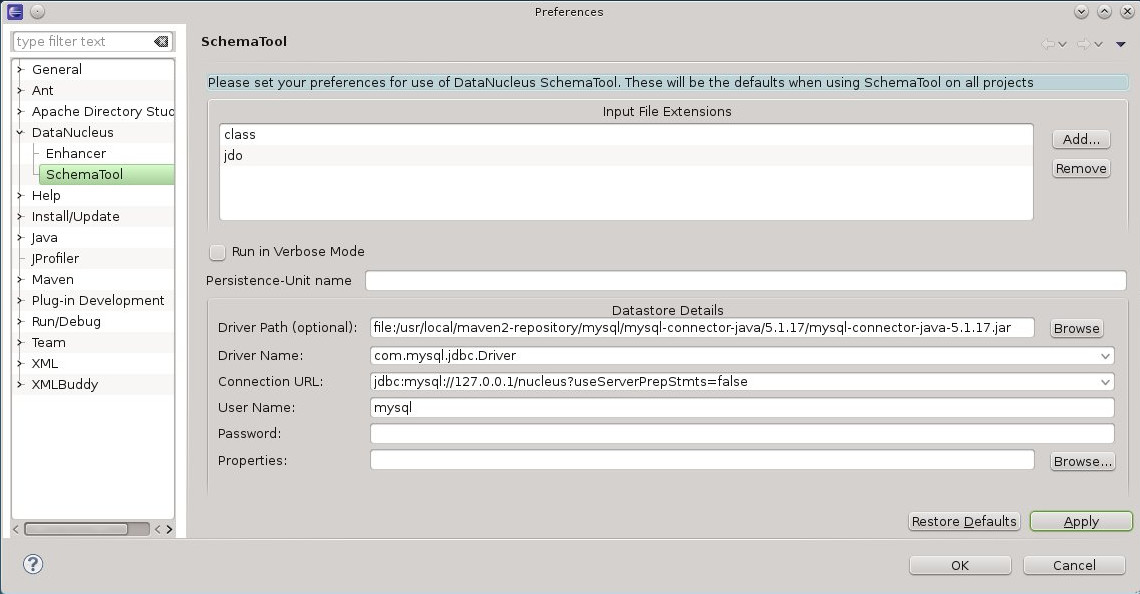
Open the "SchemaTool" page. You have the following settings
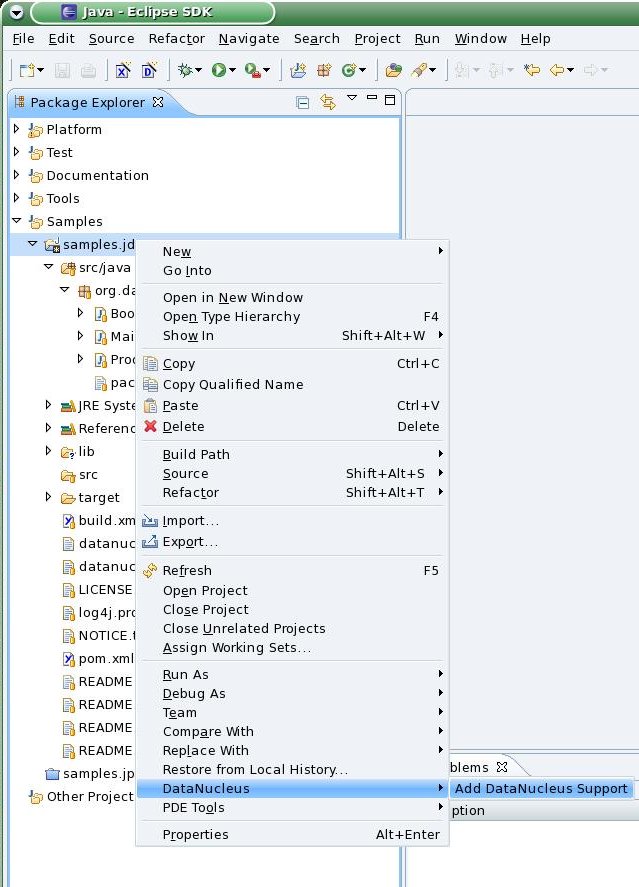
First thing to note is that the DataNucleus plugin is for Eclipse "Java project"s only. After having configured the plugin you can now add DataNucleus support on your projects. Simply right-click on your project in Package Explorer and select DataNucleus->"Add DataNucleus Support" from the context menu.
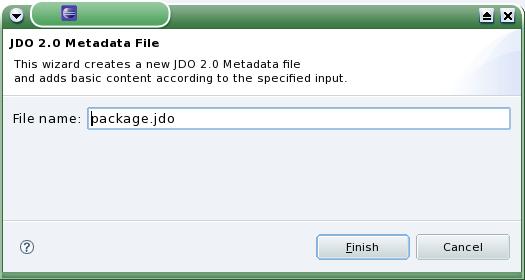
It is standard practice to define the MetaData for your persistable classes in the same package as these classes. You now define your MetaData, by right-click on a package in your project and select "Create JDO 2.0 Metadata File" from DataNucleus context menu. The dialog prompts for the file name to be used and creates a basic Metadata file for all classes in this package, which can now be adapted to your needs. You can also perform same steps as above on a *.java file, which will create the metadata for the selected file only. Please note that the wizard will overwrite existing files without further notice.
You can also use the DataNucleus plugin to generate a "persistence.xml" file adding all classes into a single persistence-unit. You do this by right-clicking on a package in your project, and selecting the option. The "persistence.xml" is generated under META-INF for the source folder. Please note that the wizard will overwrite existing files without further notice.
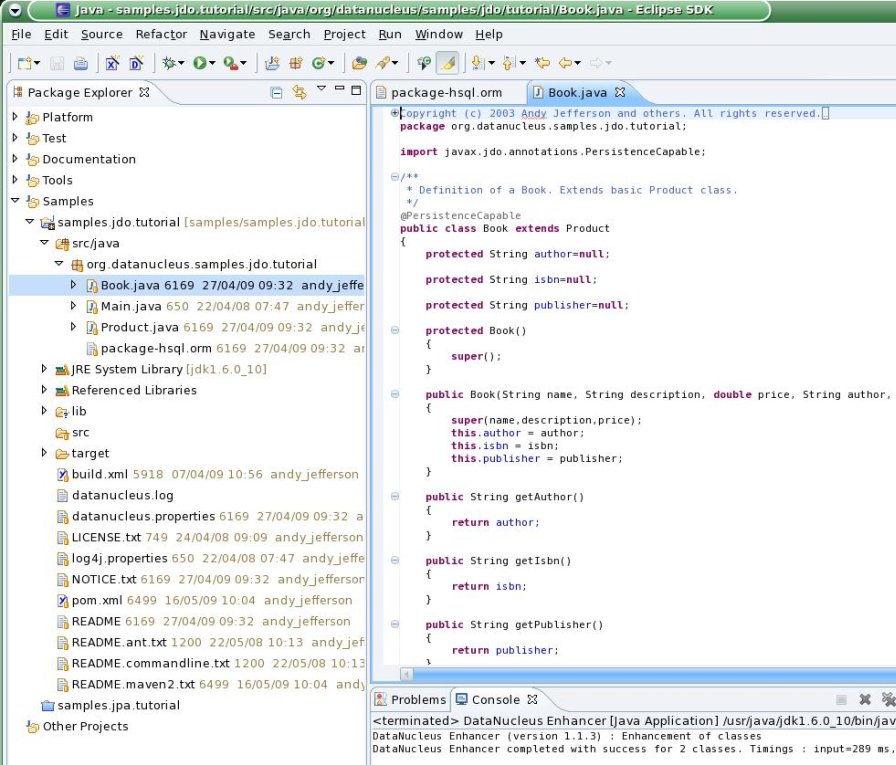
The DataNucleus Eclipse plugin allows you to easily byte-code enhance your classes using the DataNucleus enhancer. Right-click on your project and select "Enable Auto-Enhancement" from the DataNucleus context menu. Now that you have the enhancer set up you can enable enhancement of your classes. The DataNucleus Eclipse plugin currently works by enabling/disabling automatic enhancement as a follow on process for the Eclipse build step. This means that when you enable it, every time Eclipse builds your classes it will then enhance the classes defined by the available "jdo" MetaData files. Thereafter every time that you build your classes the JDO enabled ones will be enhanced. Easy! Messages from the enhancement process will be written to the Eclipse Console. Make sure that you have your Java files in a source folder, and that the binary class files are written elsewhere If everything is set-up right, you should see the output below.
Once your classes have been enhanced you are in a position to create the database schema (assuming you will be using a new schema - omit this step if you already have your schema). Click on the project under "Package Explorer" and under "DataNucleus" there is an option "Run SchemaTool". This brings up a panel to define your database location (URL, login, password etc). You enter these details and the schema will be generated.

Messages from the SchemaTool process will be written to the Eclipse Console.